Corporate Branding Identity Mockup Design: Elevate Your Presentation Without the Hassle
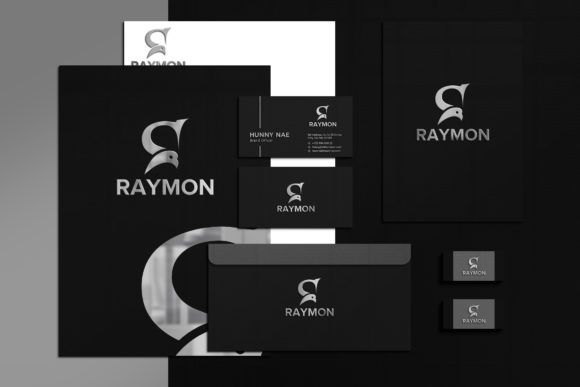
You have spent weeks refining your logo, tweaking your color palette, and perfecting your typography. The final design is ready, but when you look at it on a flat white background, it feels lifeless. It lacks context. This is where a Corporate Branding Identity Mockup Design becomes an essential tool rather than just a nice-to-have visual aid. These mockups transform abstract digital files into tangible representations of how your brand looks in the real world, providing the necessary depth, shadows, and lighting to make your work pop.
However, not all mockups are created equal. Many creators rush through the selection process, downloading low-resolution files that fail to impress clients or stakeholders. Others struggle with complex editing interfaces that require advanced Photoshop skills they do not possess. To ensure your presentation delivers maximum impact, it is crucial to understand what makes a high-quality mockup and how to utilize it effectively without falling into common traps.
The Critical Importance of Realism in Brand Visualization
When evaluating a Corporate Branding Identity Mockup Design, the primary goal should be realism. A poor quality mockup can undermine even the most brilliant design by making it look artificial or cheap. High-quality 3D realistic mockups achieve this by simulating natural lighting conditions, accurate surface textures, and correct shadow casting. When your design interacts with light and shadow realistically, the viewer's brain accepts it as a physical object, which significantly increases perceived value.
If you choose a mockup that lacks these features, your branding materials may appear flat and unprofessional. Clients often judge the quality of a service based on the quality of the presentation. A blurry image or one with harsh, unnatural shadows suggests a lack of attention to detail, potentially costing you the contract. Conversely, a crisp, well-lit mockup demonstrates professionalism and foresight.
Common Pitfalls in Selecting and Using Mockups
Even experienced designers can stumble when integrating mockups into their workflow. One of the most frequent mistakes is ignoring the technical specifications of the file. For instance, using a mockup with low resolution for large-scale print presentations is a recipe for disaster. You need a file that supports high DPI standards to ensure clarity when zoomed in or printed. A standard 3600 x 2400 pixels at 300 DPI is often the sweet spot for professional deliverables, ensuring that every pixel remains sharp regardless of the viewing medium.
Another significant oversight involves the editing interface. Many beginners assume that applying a new logo requires manual tracing or complex layer masking. This is unnecessary if you select a product designed with smart objects. Relying on tools that require manual adjustment not only wastes time but also introduces errors, such as misaligned edges or distorted perspectives. If a mockup does not support simple replacement via smart objects, it adds friction to your workflow and increases the likelihood of human error.
Furthermore, some users overlook the organization of layers within the PSD file. A disorganized file structure makes future edits difficult and frustrating. If folders are not clearly labeled or if elements are grouped chaotically, you might accidentally delete critical components while trying to tweak a single detail. Always verify that the mockup comes with fully layered and well-organized folders before committing to it.
Why Smart Objects Are Non-Negotiable
The core feature that separates a premium Corporate Branding Identity Mockup Design from a basic template is the smart object functionality. This technology allows you to double-click a specific area, paste your own logo or text, and save the file. The software automatically applies the correct perspective, warping, and blending modes to match the underlying 3D environment.
This "no-skill requirement" aspect is vital for entrepreneurs, freelancers, and marketers who may not be graphic design experts. It democratizes the ability to create stunning presentations. Instead of spending hours learning complex masking techniques, you simply replace the content. This efficiency means you can iterate through multiple concepts quickly, testing different color schemes or taglines without starting from scratch each time.
Without this feature, you risk manually distorting your images, which often results in jagged edges or incorrect angles. These subtle flaws are immediately noticeable to trained eyes and can detract from the overall credibility of your brand identity.
Evaluating Quality Before You Download
Before you finalize your purchase or download, there are specific checks you must perform to avoid disappointment. First, inspect the preview images closely. Look for consistency in lighting across different angles. Does the shadow fall naturally? Is the reflection on glossy surfaces accurate? These details indicate the effort put into the 3D modeling phase.
Second, check the included formats. A comprehensive pack should include both a PSD file for editing and a JPEG for immediate use. Having a JPEG ensures you have a quick reference or a finished image ready for social media sharing without needing to open the heavy Photoshop file. Additionally, confirm that the file count matches expectations; sometimes sellers bundle multiple variations, while others offer a single versatile design.
Third, consider the editability. A truly robust mockup should be 100% editable. This means you should be able to change not just the logo, but also the background colors, material textures, and even the lighting direction if the file permits. Limitations here restrict your creative freedom and may force you to buy additional assets later.
Practical Steps for Flawless Execution
To get the most out of your Corporate Branding Identity Mockup Design, follow a disciplined approach. Start by opening the PSD file and locating the smart object layer. Ensure your source logo is high-resolution; uploading a small, pixelated image will result in a blurry mockup, no matter how good the template is. Once you place your design, save the smart object file and return to the main window to see the automatic updates.
If you are presenting to a client, prepare multiple versions. Use the same mockup but swap out different color variations of your logo to show versatility. Because the layers are organized, you can easily toggle between them to create a dynamic presentation deck. This approach showcases your brand's adaptability and gives the client a clear vision of how the identity will function across various touchpoints.
Finally, always review the final output on different devices. What looks perfect on a high-end monitor might appear washed out on a mobile screen. Check the contrast and legibility of your text and logo within the mockup context. This final quality control step ensures that your brand communicates effectively, regardless of where it is viewed.
By avoiding low-quality templates and prioritizing features like smart objects, high resolution, and organized layers, you ensure that your corporate identity stands out. Remember, the mockup is not just a frame for your art; it is the stage upon which your brand performs. Treat it with the same level of care and attention as the design itself, and the results will speak for themselves.